Oct
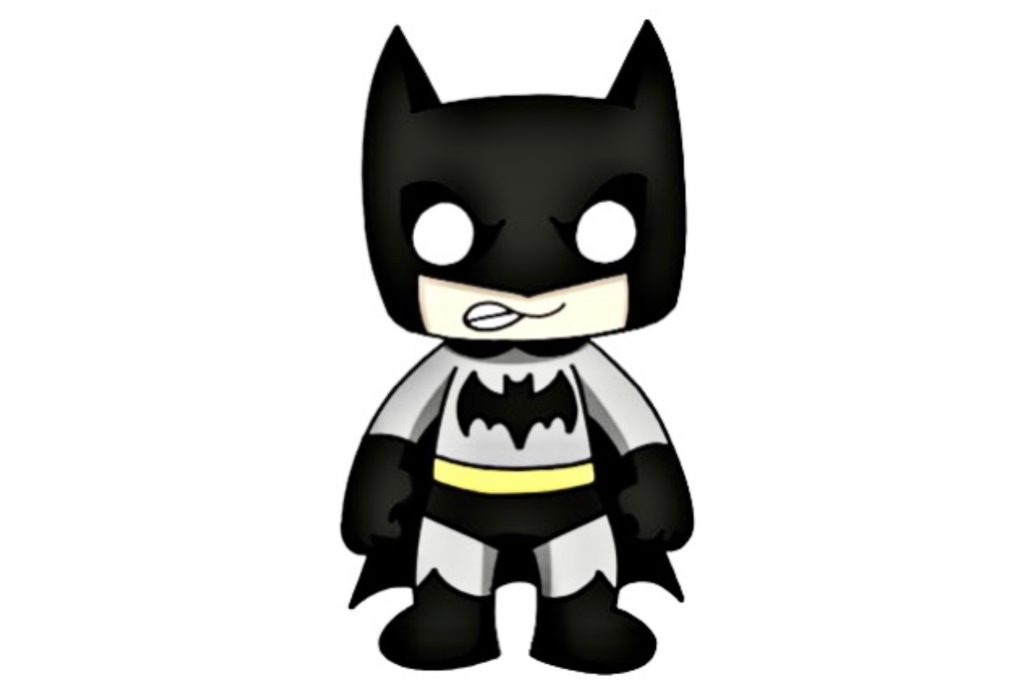
Welcome to the tutorial on how to draw Batman, the iconic superhero of Gotham City. Batman, also known as the Dark Knight or the Caped Crusader, is a beloved superhero character that has captured the hearts of fans around the world. Created by artist Bob Kane and writer Bill Finger, Batman made his first appearance in Detective Comics #27 in 1939 and has since become an enduring symbol of justice and heroism.
What sets Batman apart from other superheroes is his human vulnerability and complex persona. Unlike characters with superhuman abilities, Batman relies on his intelligence, physical prowess, and an array of high-tech gadgets to fight crime in Gotham City. Underneath the iconic mask is Bruce Wayne, a billionaire philanthropist who witnessed the murder of his parents as a child, fueling his lifelong quest for justice.
Additionally, Batman’s iconic design and symbol have become instantly recognizable. The bat-shaped logo emblazoned on his chest and his imposing cape and cowl create a striking visual image that has become synonymous with the character. Whether through comic books, films, or various other media adaptations, BatMan has captivated audiences for decades, standing as a symbol of justice, strength, and the indomitable spirit of the human will.
Now we will break down the process into easy steps, allowing you to create your own stunning Batman artwork. Get ready to unleash your creativity and bring this legendary character to life!

How To Draw Batman
Ensure you have the following supplies ready:
Pencils: A variety of graphite pencils for sketching and shading.
Erasers: Regular erasers for precision.
Paper: High-quality paper or a sketchbook.
Reference images: Gather images of the character.
- Step 1 – Draw The Head
- Step 2 – Define The Face
- Step 3 – Draw The Eyes And Facial Features
- Step 4 – Adding Details To Batman’s Face
- Step 5 – Sketch The Body
- Step 6 – Outline The Arms
- Step 7 – Adding The Symbolic Bat Logo
- Step 8 – Draw The Feet
- Step 9 – Draw Batman’s Cape
- Step 10 – Let’s Color!
- Tips On How To Draw Batman
- FAQ On How To Draw Batman
Step 1 – Draw The Head

Batman Drawing Step 1
Let’s kick things off by focusing on the head of our drawing. To start, grab your pencil and gently sketch a smoothly curved line, moving it from the left to the right side to create the upper part of the head. Now, it’s time to bring out Batman’s distinctive ears. Begin this step by starting inside the left ear, gently moving your pencil upwards, and then replicate this exact process on the right side. By doing this, we’re making sure both ears are perfectly aligned at the same height, maintaining that iconic look we all recognize.
Step 2 – Define The Face

Batman Drawing Step 2
Moving on to the second step in our Batman drawing adventure, let’s create the jawline for our Caped Crusade. Begin by guiding your pencil in a gentle curve, starting from the top left, and slowly bring it down to meet the jawline. Don’t forget to repeat this same curvy process on the right side. To achieve a more natural appearance, go ahead and add a slight curve to round out the jaw before connecting those key points
Step 3 – Draw The Eyes And Facial Features

Batman Drawing Step 3
Let’s work on those iconic Batman eyes. Begin by sketching two sizable circles, ensuring that they are perfectly matched in size. Moving on, let’s give Batman’s expression that extra depth. Above each eye, delicately draw frown lines to emphasize his unwavering resolve. Start just above the left eye, gently curving the line downwards, and as you progress past the eye, gently turn it upwards. The same technique applies to the right side.
Step 4 – Adding Details To Batman’s Face

Batman Drawing Step 4
Draw a slight frown for the mouth with curved lines. Curve down the sides of the face to the chin. Give Batman a frowning mouth by curving it down on the right side and hooking it up, then do the same on the left side. As a final touch in this step, draw a straight line horizontally across the mouth. This small detail contributes to the overall composition, highlighting Batman’s unwavering commitment to his mission.
Step 5 – Sketch The Body

Batman Drawing Step 5
Shifting our focus towards Batman’s body, we’ll start this step by working on the area beneath his chin. Moving to the body, below the chin, draw curves for the sides of the body, then connect them with a downward curve. These curves will eventually define the shape of Batman’s upper body. Make it thicker in the middle for the belt.
Step 6 – Outline The Arms
Batman Drawing Step 6
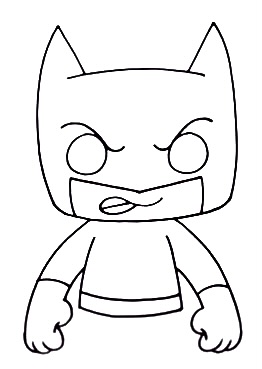
This time, we’ll focus on his arms. Start by drawing his arms with lines that curve outward from just above the armpits. This will give Batman a strong and dynamic look, like he’s ready for action. Pay attention to the inside parts of the arms. Draw the thumbs and fingers to make them look realistic. Make sure the fingers overlap a bit, so they look natural. This will make Batman’s hands look just right.
Then, draw Batman’s gloves. Start by drawing curved lines at the wrists. These lines will connect smoothly to the gloves, giving them a cool and functional style. Once you’re satisfied with the gloves, continue working on the body.
Step 7 – Adding The Symbolic Bat Logo

Batman Drawing Step 7
Under the neck, draw a part of the cape. Make two curves going outward on each side and add the bat symbol in the center of the chest. The Batman symbol is an essential part of his identity. Carefully draw the bat logo in the center of his chest. This symbol is instantly recognizable and represents justice and fearlessness. Carefully craft the bat logo in the center of his chest, using sharp angles and sweeping curves. This emblem should be prominent and instantly recognizable, symbolizing Batman’s presence and fearlessness.
Step 8 – Draw The Feet

Batman Drawing Step 8
Let’s move on to the next step, Step 8, where we’ll focus on drawing Batman’s legs and defining his imposing boots. For the legs, curve down from the hips to the front of the legs, ensuring the same height on both sides. Draw a straight line between the legs. Continue with curves from the hips to the heels and connect these points to the ankles with curves. Define the toes by curving out from the ankles. Create boots by drawing angled lines up from the front of the legs and curving them to the back of the boots.
Step 9 – Draw Batman’s Cape

Batman Drawing Step 9
Now, let’s move on to the finishing touch – drawing Batman’s iconic cape. This step is where we add that dramatic flair to our Dark Knight’s appearance, giving him that air of mystery and power. Extending two straight lines down from Batman’s shoulder points. Imagine these lines as the starting point of his majestic cape, which flows behind his arms. As these lines reach the legs, carefully curve them to create the flowing shape of the cape. To complete this step, let’s add a final curve in between the legs.
Step 10 – Let’s Color!

Batman Drawing Step 10
Let’s paint Batman’s suit with a deep and commanding black. It’s the shade of the night, symbolizing his relentless pursuit of justice. Onto the utility belt, which we’ll color in a striking shade of yellow. The yellow belt is like a beacon of hope in the darkness of Gotham City, showcasing Batman’s resourcefulness.
Your Batman Is Complete!
Congratulations on completing your Batman drawing! You’ve reached the finish line, and your Batman drawing is now fully realized! It’s time for a well-deserved celebration because you’ve accomplished something truly remarkable. To sum up, to draw Batman, start by sketching the head with a smoothly curved line and adding the distinctive ears. Define the face by creating a jawline with gentle curves. Draw sizable circles for the eyes and add frown lines above each eye. Add a slight frown for the mouth and curve down the sides of the face to the chin. Outline the body, making it thicker in the middle for the belt. Draw the arms with outward-curving lines, adding details like thumbs, fingers, and gloves. Incorporate a part of the cape and draw the bat symbol in the center of the chest. Define the legs and draw imposing boots. Finally, draw Batman’s iconic cape by extending two straight lines from the shoulder points and curving them downwards. Add a final curve in between the legs. Then bring your drawing to life by adding color!
Tips On How To Draw Batman
Batman’s costume and symbols offer opportunities for creative storytelling. Consider incorporating symbolic elements into your drawings, such as bats, Gotham City’s skyline, or shattered glass, to add depth and meaning to your artwork.
Don’t forget about the background! Develop an engaging and visually interesting backdrop for Batman. Whether it’s a gritty cityscape or a mysterious alleyway, the environment can enhance the overall impact of your drawing.
FAQ On How To Draw Batman
Should I draw Batman in his classic costume or try a different version?
It’s entirely up to you! You can draw Batman in his classic costume or explore alternate versions like the armored suit from “The Dark Knight Returns” or other variations from different comics or movies.
How can I draw Batman in action?
To depict Batman in action, emphasize his body posture. Dynamic poses, a sense of motion, and flowing cape lines can make him look like he’s in the middle of a heroic feat.


Stex
Welcome to the tutorial on how to draw Batman, the iconic superhero of Gotham City. Batman, also known as the… View More