
Nov
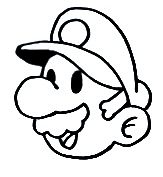
In the vast world of video games, there exists a character who has transcended the boundaries of pixels and screens to become a true icon. Mario, the lovable plumber in his signature red hat and blue overalls, has captured the hearts of gamers and non-gamers alike for decades. With his infectious charm, endearing personality, and unforgettable adventures, Mario has become a symbol of joy, nostalgia, and the power of imagination. Originating from the creative minds at Nintendo, Mario made his debut in the groundbreaking arcade game “Donkey Kong” in 1981. Originally named “Jumpman,” this humble character quickly became a sensation, captivating players with his daring pursuit to rescue his beloved Pauline from the clutches of the mighty ape, Donkey Kong.
Mario has become a beloved symbol of nostalgia for those who grew up with him and a source of delight for new generations discovering his adventures for the first time. Now, with the help of Jorz.art, you have the opportunity to dive into his world and bring this beloved character to life by learning how to draw Mario your own artwork. In this tutorial, Jorz.art will guide you step by step, revealing the secrets behind capturing Mario’s essence on paper. So, grab your pencils

How To Draw Mario
Ensure you have the following supplies ready:
Pencils: A variety of graphite pencils for sketching and shading.
Erasers: Regular erasers for precision.
Paper: High-quality paper or a sketchbook.
Reference images: Gather images of the character
- Step 1 – Draw The Nose
- Step 2 – Let’s Draw Mario’s Mustache
- Step 3 – Draw His Chin And Ear
- Step 4 – Let’s Draw His Hat
- Step 5 – Let’s Draw His Arm
- Step 6 – Complete Mario’s Body
- Step 7 – Draw His Others Arm
- Step 8 – Draw His Feet
- Step 9 – Draw His Other Foot
- Step 10 – Coloring Your Mario
- Tips On How To Draw Mario
- FAQ On How To Draw Mario
Step 1 – Draw The Nose

Mario Drawing Step 1
Start by drawing Mario’s nose. Place it in the middle of the paper but towards the top, leaving enough room for his body below. Draw a “C” shape for his nose. Make sure to close the “C” shape a little further. Draw his left eye. It’s hidden behind the nose, so draw an oval shape and color it in. You can make it taller by drawing over it again. Repeat the same step for his right eye, but draw a larger oval since it’s not hidden.
Step 2 – Let’s Draw Mario’s Mustache

Mario Drawing Step 2
Start from the bottom of his nose and draw the “U” shape coming down and then back up. Draw a wavy line that starts from the top of the “U” shape and goes down a little. Then, draw another wavy line going up from the bottom of the “U” shape. Connect these lines to complete the tongue. Mario’s tongue adds a playful touch to his smile! Mario is looking even more lively and joyful now with his big smile and tongue!
Step 3 – Draw His Chin And Ear

Mario Drawing Step 3
Draw his chin. It’s another “U” shape that curves under and comes back up. Draw his ear. Start at the end of his chin and draw a backwards “C” shape that is about the same size as his nose. Inside the ear, draw a forward “C” shape, almost like the letter “E.”
Step 4 – Let’s Draw His Hat
Mario Drawing Step 4
Now, let’s draw Mario’s hat! We’ll start with the front part. Imagine a curved line that goes out and then back around, connecting to his ear. Next, draw a curvy “S” line close to his eye. Connect it back in, but leave another gap for the sideburns. Then draw the rest of his forehead, curving it into the hat. Color in the bottom part of the hat. Moving on to the top of the hat! Draw a big curve that goes up and then back down. It comes really close to his ear but doesn’t touch it. See that little bump at the back of his hat? Draw it and connect it to his ear. Now, let’s draw the circle on the front of his hat. It’s the letter “M” for Mario! Draw a partial circle that doesn’t connect all the way because the rest is hidden behind the visor. Draw two curves that come out from his hat. Then, connect them with a backwards “3” shape to form his sideburns
Step 5 – Let’s Draw His Arm

Mario Drawing Step 5
Now, let’s move on to drawing Mario’s body and arms! Imagine a sideways “U” shape right underneath his chin. This will be one of his arms. At the end of the arm, draw a curvy line to make his hand. Now, let’s add his thumb! Draw a little sideways “U” shape to represent his thumb, and then add another curve going in the opposite direction at the bottom of his hand.
Step 6 – Complete Mario’s Body

Mario Drawing Step 6
Draw the rest of his body. Start at his chin and draw a big half-circle that goes all the way around and connects to his hand. This will be the shape of his body. Wow, Mario is really starting to take shape! Next, let’s add his overalls. Draw a smaller shape, just like the body shape we drew earlier, starting from next to his arm and connecting to his wrist. This will be the lower part of his overalls. It’s like a special pair of pants that Mario wears! Draw a square-shaped “U” just below his chin. This will be the top part of his overalls. It’s like a special pocket where Mario keeps all his tools! And what’s a pair of overalls without buttons? Let’s add two yellow buttons on his belly, right in the middle of the square “U” shape. These buttons add a fun and stylish touch to Mario’s outfit!
Step 7 – Draw His Others Arm

Mario Drawing Step 7
Draw a diagonal line coming out of his chest. Picture a curved shape that represents the hand part of the glove. Connect this curve to his arm and mustache. Draw his thumb and the rest of his hand. Imagine a “U” shape for his thumb, extending from his nose. Connect the thumb to the rest of his hand, and draw a curve at the bottom that doesn’t connect to the mustache.Wow, Mario now has both of his arms and hands, ready to jump into action!
Step 8 – Draw His Feet

Mario Drawing Step 8
Draw a “U” shape underneath his fist, starting next to it and going down and back up, connecting to the glove. Draw the bottom of his shoe by extending a line from the glove, adding a small bump,curve the line back out and into the front of his boot. This will create the shape of his shoe. Mario’s shoes are special because they help him move quickly and give him extra grip! You’re doing an amazing job capturing all the details! Keep up the great work
Step 9 – Draw His Other Foot

Mario Drawing Step 9
Picture an upside-down “U” shape starting from where his button is. Imagine the line going out, then curving back in, and finally connecting to the front of his boot. This will create the shape of his other foot. Mario needs both his feet to help him jump high and stomp on his enemies!. Wow, Mario is almost complete now! He has his feet ready to take him on all his adventures. His shoes are designed perfectly for his heroic feats.
Step 10 – Coloring Your Mario

Mario Drawing Step 10
It’s time to bring Mario to life with colors! First, grab your red coloring tool and color his hat. Mario’s overalls are his signature outfit, and they’re always a cool blue color. Take your time and color them in. Then color his shoes. Mario’s shoes are brown, just like the color of tree bark. Use your brown coloring tool and carefully shade in his shoes, giving them a nice earthy tone. Feel free to experiment with shading and highlights to make your artwork more vibrant and three-dimensional.
Your Mario Is Complete!
Congratulations! You’ve successfully learned how to draw Mario, the beloved video game character. This step-by-step tutorial has guided you through each phase of the drawing process, from drawing the basic shapes to adding details and colors. By following these steps, you’ve created your very own Mario!
To sum up, to draw Mario, start by drawing his nose, eyes, and mustache. Then, draw his chin, ear, and hat. Add the “M” logo and sideburns on the hat. Next, draw his arms and hands, along with his thumbs. Connect the arms to his body, which is a big half-circle. Draw his overalls, including a square-shaped top and yellow buttons. Draw one foot with a shoe and another foot with a boot. Finally, color your drawing to bring Mario to life. By following these steps, you can create a detailed drawing of Mario, ready to embark on his iconic adventures in the Mushroom Kingdom.
Tips On How To Draw Mario
Focus on Expressions: Mario’s expressions are key to capturing his joyful and adventurous spirit. Pay close attention to his eyes, eyebrows, and mouth to convey his emotions accurately.
To complete your Mario drawing, consider adding a background or additional elements to enhance the composition. You can depict Mario in his iconic Mushroom Kingdom, or perhaps include other characters like Luigi or Princess Peach to create a dynamic scene.
FAQ On How To Draw Mario
Any tips for drawing Mario’s iconic hat?
Start by drawing the overall shape of the hat using curved lines. Then, add the “M” emblem in the center, making sure it follows the contours of the hat. Use shading and highlights to give the hat a three-dimensional appearance.
Any suggestions for creating a dynamic background?
Consider incorporating elements from Mario’s universe, such as iconic items like mushrooms, question blocks, or the familiar landscapes of the Mushroom Kingdom. You can also depict Mario in action, jumping over obstacles, or interacting with other characters to add excitement to the scene.

Stex
In the vast world of video games, there exists a character who has transcended the boundaries of pixels and screens… View More