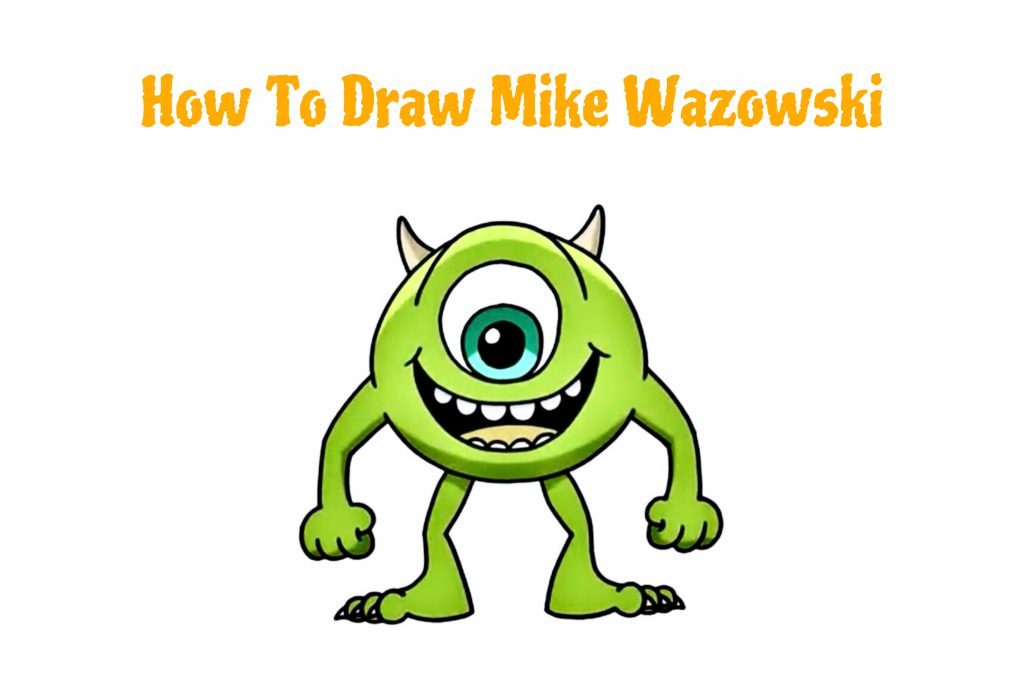
Welcome back to Jorz.art, my friend! Today, we will embark on an artistic adventure as we learn how to draw Mike Wazowski, a beloved figure in the world of animation known for his one big eye, green skin, and charismatic personality.
Mike Wazowski first came to life on the screen in the animated film Monsters, Inc. Created by Pixar Animation Studios, the film took audiences on a journey into the world of monsters. Mike, along with his best friend James P. “Sulley” Sullivan, embarked on an adventure that challenged their perceptions and ultimately taught them the value of friendship, love, and laughter. With his circular shape, bright green color, and a single, large eye, Mike stood out among the crowd of animated characters. His endearing and humorous personality, brought to life by the voice acting of Billy Crystal, added another layer of charm to his character, making him instantly likable.
How To Draw Mike Wazowski
Ensure you have the following supplies ready:
Pencils: A variety of graphite pencils for sketching and shading.
Erasers: Regular erasers for precision.
Paper: High-quality paper or a sketchbook.
Reference images: Gather images of the character.
Coloring tools: use colorful crayons to bring the character to life
- Step 1 – Drawing The Eyes
- Step 2 – Detailing the Eye
- Step 3 – Shaping the Mouth
- Step 4 – Adding Teeth And Filling the Mouth
- Step 5 – Shaping The Head And Adding The Horns
- Step 6 – Drawing The Feet And Toes
- Step 7 – Drawing The Arms And Hands
- Step 8 – Finalizing The Details And Adding Color
- Tips On How To Draw Mike Wazowski
- FAQ On How To Draw Mike Wazowski
Step 1 – Drawing The Eyes

Mike Wazowski Drawing Step 1
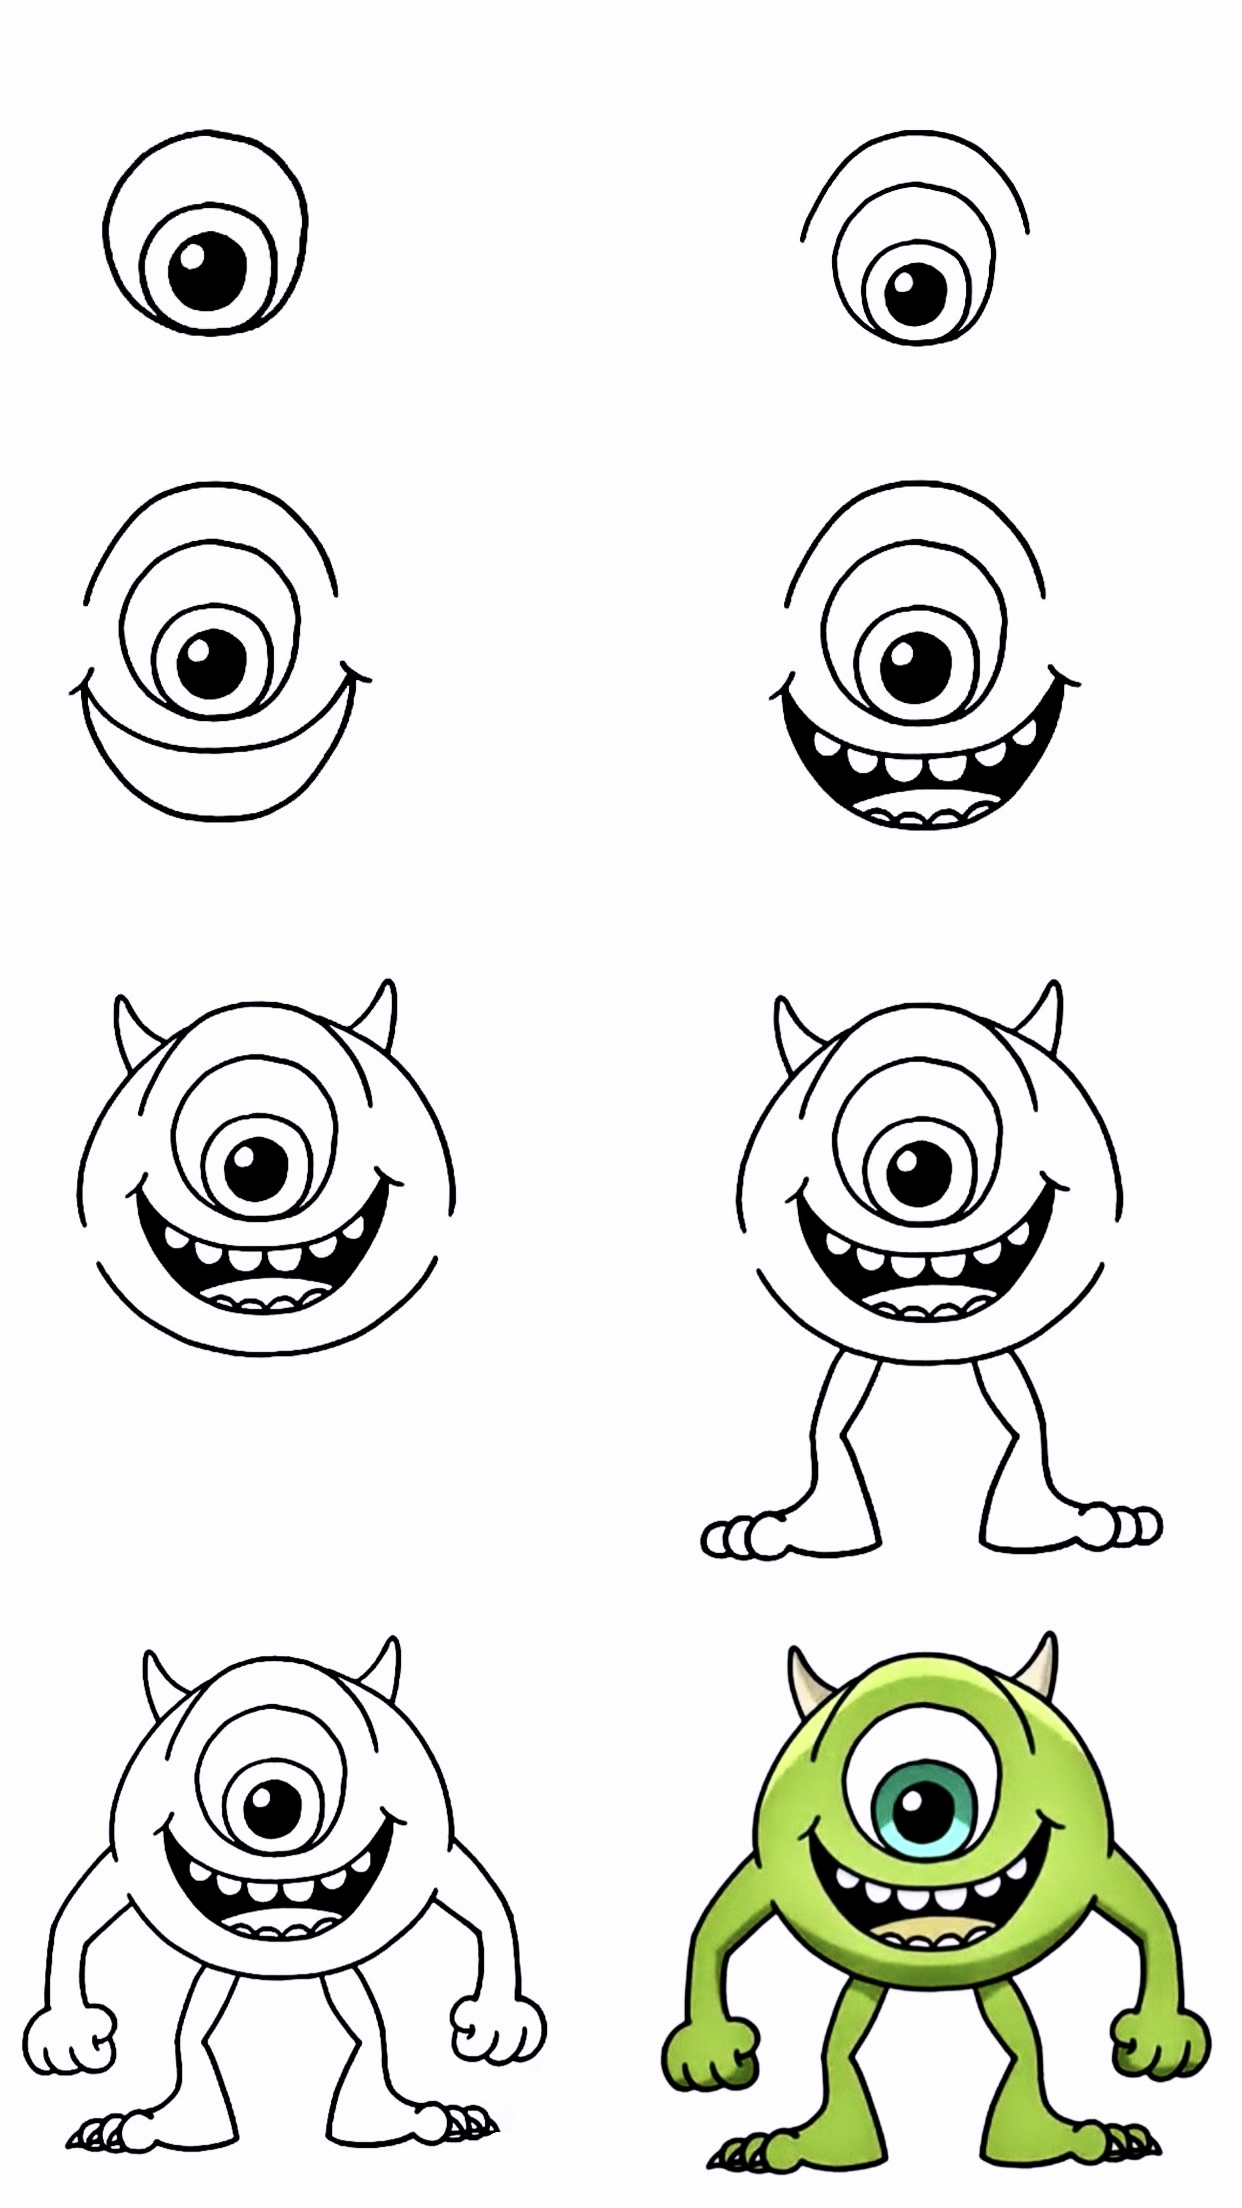
We will draw the most important part of Mike, which is his big eyes. Draw a large circle in the middle of the paper. This first circle will be the outer part. Next, we draw a smaller circle inside. To continue, let’s draw Mike’s pupils. This time it continues to be circles, but smaller. Draw another circle inside the second circle, and remember to color the pupil black
Step 2 – Detailing the Eye

Mike Wazowski Drawing Step 2
Now, add a small circle on the top left of the iris to create a highlight. Fill in the bottom of the pupil, carefully going around the highlight. These details will bring Mike’s eye to life. Do not forget to draw a curved line above Mike’s eye to form his eyebrows.
Step 3 – Shaping the Mouth
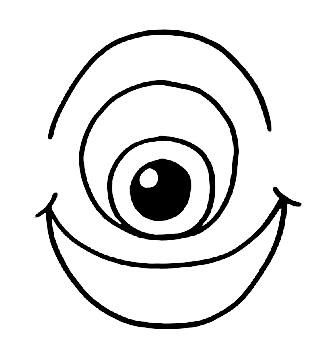
Mike Wazowski Drawing Step 3
Moving on to the mouth, sketch a curve along the top of the eye, starting on the left side. Bring it up slightly higher in the middle, then curve it across and back down. This will form the top edge of Mike’s mouth. On the left side of the eye, draw a curve that goes down, rounds out, and then pulls up.
Step 4 – Adding Teeth And Filling the Mouth
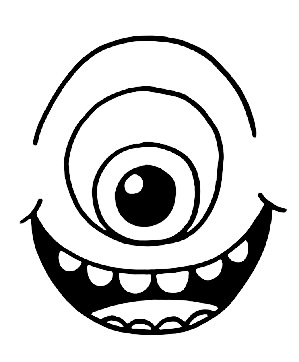
Mike Wazowski Drawing Step 4
Let’s add some teeth to Mike’s smile! Start by drawing the top row of teeth. Draw teeth inside the mouth. Within the gap between the teeth, draw a curved line that goes up and then down to represent Mike’s tongue. Fill the inside of the mouth, carefully outlining the teeth and the contours of the tongue.
Step 5 – Shaping The Head And Adding The Horns

Mike Wazowski Drawing Step 5
Draw a curve that starts from the left side of the mouth and extends out to create Mike’s head. Repeat this process on the right side. Next, add the iconic horns on top of Mike’s head. Start on the left, bringing the curve up, then round it off. Complete the shape by bringing it down and back in.
Step 6 – Drawing The Feet And Toes

Mike Wazowski Drawing Step 6
Draw straight lines from Mike’s head down to draw Mike’s legs. You do not need to draw perfectly straight lines, Jorz.art recommends drawing a little curve to make Mike’s legs more realistic.
Step 7 – Drawing The Arms And Hands

Mike Wazowski Drawing Step 7
Mike may look small, but he is certainly a very strong and agile monster. Let’s draw our monster friend’s two muscular arms using flexible curves. Starting from both sides of the face, draw curved lines toward both sides. Continue drawing those curves like the sample picture. When drawing the hand, use small, curved lines to draw his fist
Step 8 – Finalizing The Details And Adding Color

Mike Wazowski Drawing Step 8
To complete your drawing of Mike Wazowski, add the final details, such as his claws, folds, and any additional features you’d like. Once you are satisfied with your drawing, you can add a splash of green color to bring Mike to life even more! And that’s it, let’s welcome Mike!
Your Mike Wazowski Is Complete!
Congratulations on completing the 10-step process of learning how to draw Mike! Mike Wazowski is known for his expressive face. Have fun exploring different facial expressions, from his classic smile to exaggerated surprise or mischief. Play with eyebrow positions, mouth shapes, and eye sizes to bring out different emotions in your drawing.
Tips On How To Draw Mike Wazowski
To enhance the storytelling aspect of your artwork, consider adding background elements related to Mike Wazowski’s world.
You could include doors from Monsters, Inc., scare canisters, or even other characters from the film. These additions will make your drawing more engaging and visually interesting.
FAQ On How To Draw Mike Wazowski
How can I make Mike Wazowski’s eye look realistic and lively?
To make Mike’s eye look more realistic, pay attention to the shading and highlights. Use lighter shades for the iris and create a gradient effect from the center to the edges. Add a small highlight to make the eye appear glossy.
How can I make my drawing stand out?
Consider placing Mike Wazowski off-center or using interesting angles to create a visually dynamic composition. You can also add vibrant colors or contrasting backgrounds to make your drawing pop.
Welcome back to Jorz.art, my friend! Today, we will embark on an artistic adventure as we learn how to draw… View More

